Solvent flushing remains common in low-pressure polyurethane metering machines because the mixing head holds a small amount of reactive two-component material after every shot or pour. A quick solvent rinse is usually the simplest way to dissolve or dilute that film before it cures into a blockage. But solvent is not the only workable method, and on many production lines it is not the best default. The right choice depends on material reactivity, fillers, viscosity, how often the line stops, and whether the machine must switch formula or color during a shift.
Why Solvent Flushing Became the Default Cleaning Method
Low-pressure PU machines meter polyol and isocyanate into a dynamic mixer or a static mixing element, then discharge the mixed material into a mold or open pour. The mixer cannot empty itself completely. Films remain on rotor surfaces, chamber walls, seal faces and discharge passages. As soon as the metering stops, those films begin to react.
Solvent flushing became the standard response because it targets the problem directly. A compatible solvent can dilute uncured liquid film, dissolve early-stage soft residue and carry particles out of the head before the reaction advances. It works with many material families, requires no major hardware change, and is easy for an operator to repeat. For that reason, many machine builders include an automatic flushing program, and many factories accept the solvent cost as part of running low-pressure equipment.
The weakness is that solvent flushing treats the symptom after each interruption rather than reducing the amount of residue left behind.
What Residual Mixed Material Actually Does Inside the Head
The failure sequence is mechanical and chemical. A thin mixed film first becomes tacky, then builds viscosity, then cures into a solid elastomer or rigid foam residue. Heat speeds the reaction, so a heated mixing head or a warm production environment shortens the time available before the film becomes difficult to remove.
That residue creates three practical problems.
First, it narrows flow channels. The next shot must pass through a smaller effective opening, which can raise pressure and change the relationship between component flow rates. In a low-pressure system, even a small flow restriction on one side can shift the A to B ratio before the operator notices a hard blockage.
Second, it creates dead zones. Cured deposits behind a rotor or in a corner can break loose later and contaminate a fresh shot. The resulting defect may appear only in sporadic parts, which makes it harder to trace.
Third, it accelerates further buildup. A rough cured surface catches more material on the next cycle, so the required cleaning interval becomes shorter as the head ages.
That is why flushing is not only about preventing a complete blockage. It is also about keeping the mixing cavity hydraulically predictable shot after shot.
Where Solvent Flushing Earns Its Place and Where It Becomes a Burden
Solvent flushing is often a sensible choice for short, irregular production runs and for materials that cure quickly or leave a sticky film. It also supports fast formula changeovers when the solvent is selected to match both components and the mixed residue. The process is simple to automate and easy to train.
The cost side depends on the factory context.
A high-frequency operation can consume a large amount of solvent even when each rinse is small. The plant then carries solvent inventory, manages ventilation and flammability controls, documents waste disposal, and checks that residual solvent has been fully removed before the next shot. Moisture in stored solvent can also become a process problem. On an isocyanate side, water contamination reacts with the material and can create pressure or solid reaction products, so the solvent must stay dry.
Some solvents shorten seal life or attack components inside the head. A solvent that works for one polyol formulation may not be compatible with a filled system, a high-viscosity curative or a specialty additive. The cleaning method should therefore be evaluated together with the material package, not copied from a different factory line.
Alternatives That Can Replace or Reduce Solvent Flushing
The alternatives separate into four broad groups: dry purge, compatible liquid purge, mechanical removal, and disposable or removable mixing elements.
| Cleaning method | What it does | Best use | Main limit |
|---|---|---|---|
| Dry air or nitrogen purge | Blows liquid material out of the chamber and passages | Short stops with low-viscosity, unfilled material | Does not dissolve cured film or remove sticky deposits |
| Compatible liquid purge | Displaces mixed material with a non-curing plasticizer or polyol | Medium stops and formula changeovers with compatible materials | Must be fully removed from the next shot and must not disturb the ratio |
| Mechanical cleaning | Opens the head and wipes, scrapes or brushes the stator, rotor and seals | End of shift or filled, high-viscosity systems | Labor and downtime; only works when the head is designed for access |
| Removable mixing elements | Replaces a static mixer or disposable chamber after use | Fast color changes, reactive formulas, contamination-sensitive parts | Higher consumable cost and more operator discipline |
Nitrogen or dry air purging is the easiest first reduction in solvent use, but it must be understood as a liquid displacement step. It pushes material out before it cures. It does not clean a head that already has cured deposits, and it can leave a thin wetted film that still reacts after the purge stops.
A compatible liquid purge works well when the plant can accept a small amount of the purge liquid in the next shot or when the purge liquid is part of the formulation. For example, a plasticizer already used in the polyol side can rinse the mixed head without introducing a foreign solvent. The main requirement is that the purge liquid is chemically compatible with the next shot and does not build up in seals or stagnant zones.
Aqueous cleaning is not a universal replacement. Water reacts with isocyanate and may be unsafe or damaging if it enters the isocyanate side. Aqueous cleaning can work in limited cases after the isocyanate side has been mechanically isolated and the polyol side is water-tolerant, but it should not be treated as a simple substitute for solvent on a mixed head.
The strongest lines usually combine methods. A short dry purge keeps the head usable between pours, a small solvent or compatible-liquid flush handles end-of-shift cleaning, and a removable mixing element takes over for frequent color changes or filled materials.
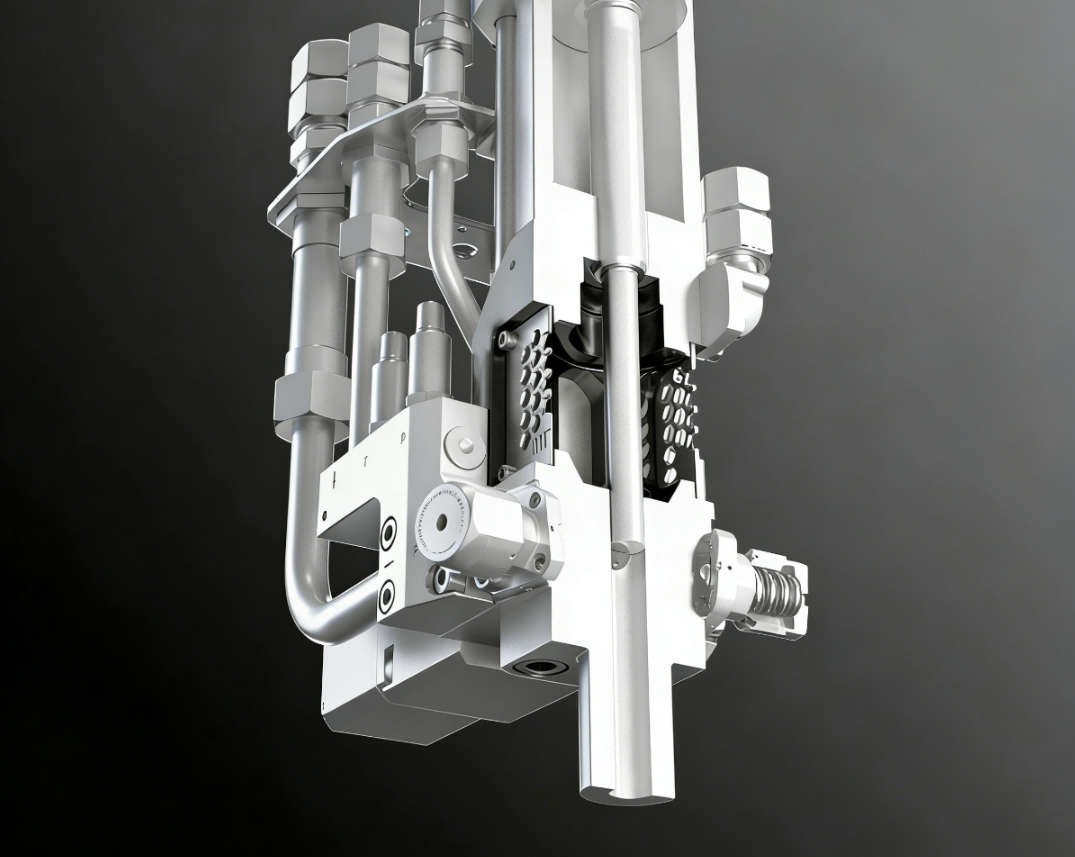
Cleaning method choice should be fixed together with machine configuration, not added after installation. A metering line with hard-to-reach mixing elements and no purge control will push the plant back toward solvent even when a lower-solvent process was intended. <Guide to Low-Pressure Foaming Machines for PU Elastomers> covers how metering, mixing-head and automation choices affect daily operation and maintenance.
How to Select a Cleaning Method for Your Line
Start with the material, not with the machine brand. List the polyol side, the isocyanate or curative side, fillers, viscosity at processing temperature and pot life. Then list the actual interruptions: shot-to-shot pauses, end of shift, weekend shutdown, color change and maintenance opening.
For each interruption, define the cleaning result you need. A shot-to-shot pause may only require that no mixed film remains. A weekend shutdown requires that surfaces stay clean enough to restart without dismantling. A color change may require that no previous pigment or reacted film remains visible in the next part.
Then compare methods against three measurable signals.
First, check the pressure before and after cleaning. A good cleaning sequence should return the head to the same stable pressure window as a clean head. If pressure creeps upward after a few cycles, the purge is leaving material behind.
Second, inspect the first shot after cleaning. Look for streaks, soft spots, bubbles or color carryover. A method that produces a clean part only after several scrap shots may still be acceptable, but the number of scrap shots should be consistent and recorded.
Third, open the head at a planned interval and inspect the rotor, chamber and seal area. The visual check confirms whether the automated purge is doing what the pressure and part data suggest.
A practical trial should compare the current solvent method against one alternative over several production shifts, using the same formula and the same stop pattern. Do not switch an entire line based on a single clean part after one manual cleaning. Record solvent consumption, scrap shots, cleaning time and any downstream defect reports together.
Machine Features That Reduce Cleaning Demand
The machine itself can make every cleaning method more effective.
A mixing head with fewer dead zones and smoother flow paths leaves less residue. A removable dynamic mixer or replaceable static element allows mechanical cleaning without opening the entire head. Recirculation on the component sides keeps material moving during a pause so the material reaches the mixing point at stable temperature and viscosity.
Temperature control matters as much as mechanical access. If the head stays within the correct processing window, the mixed film cures more slowly and solvent or dry purge has more time to work. If the head overheats, even a good flushing program may be chasing cured deposits that formed before the first rinse.
Automated purge sequencing is the most useful control feature. The machine should run the same purge step every time: stop component flow, discharge residual mix, apply the selected cleaning medium, dwell, then discharge again. The operator should be able to start the sequence with one command and see whether it completed normally.
On Haifeng Polyurethane Machinery’s LJJ low-pressure foaming machines, for example, the control system includes an automatic pouring-head cleaning function. That allows the cleaning step to be defined in the recipe and executed the same way after each interruption, rather than depending on operator timing.
Even with automation, the cleaning method still needs a defined trigger. A short pause, an end-of-shift stop and a material change are different events and may need different purge steps. The machine should be able to store those recipes and record when each cleaning sequence ran.
Next Step: Match the Cleaning Method to Your Material
If you are choosing a low-pressure machine or revising the cleaning procedure on an existing line, send the material data and current stop pattern to define the lowest-cost cleaning method that will not contaminate the next shot.
Tell us the polyol and isocyanate or curative system, filler loading, processing viscosity, pot life, the shortest and longest production stops, color-change frequency, current solvent consumption, and whether the head can be opened for mechanical cleaning.
Contact Haifeng Polyurethane Machinery at info@haifeng-automation.cn or WhatsApp: 86 13566296633.
FAQ
Does every low-pressure PU machine require solvent flushing?
No. Many machines can run with dry air or nitrogen between short pours, especially with unfilled, low-viscosity materials. Solvent or a compatible liquid purge becomes more useful when the material cures quickly, leaves a sticky film, or the machine must change color or formula.
Can air purge completely replace solvent flushing?
Only for the easiest cleaning task. Air purge displaces liquid material but does not dissolve cured film or remove sticky residue from dead zones. It works best as a short-stop step, with solvent or mechanical cleaning still used at the end of a shift or after longer interruptions.
What is the main risk of switching to a compatible liquid purge?
The biggest risk is contamination of the next shot. If the purge liquid is not fully displaced or is not part of the formulation, it can change the ratio, hardness, color or surface finish. The method should be validated by checking the first shot and confirming that the purge volume is consistent.
Which alternative is best for frequent color changes?
Frequent color changes usually benefit from removable or disposable mixing elements combined with a short purge sequence. The removable element eliminates the area where most color carryover hides, and the purge step handles the remaining wetted surfaces.
How do we validate a new cleaning method without risking full production?
Run a controlled trial on one shift or one machine. Record pressure before and after each cleaning, count the number of scrap shots, inspect the first good part, and open the head at a fixed interval to check for cured deposits. Compare those results with the current solvent method before moving the change to the full line.
If you’re interested, check out these related articles:
Advantages of Polyurethane Safety Shoes
How to Increase Output of PU Shoe Machinery
Tire Flat Proofing Liquid Filling Equipment