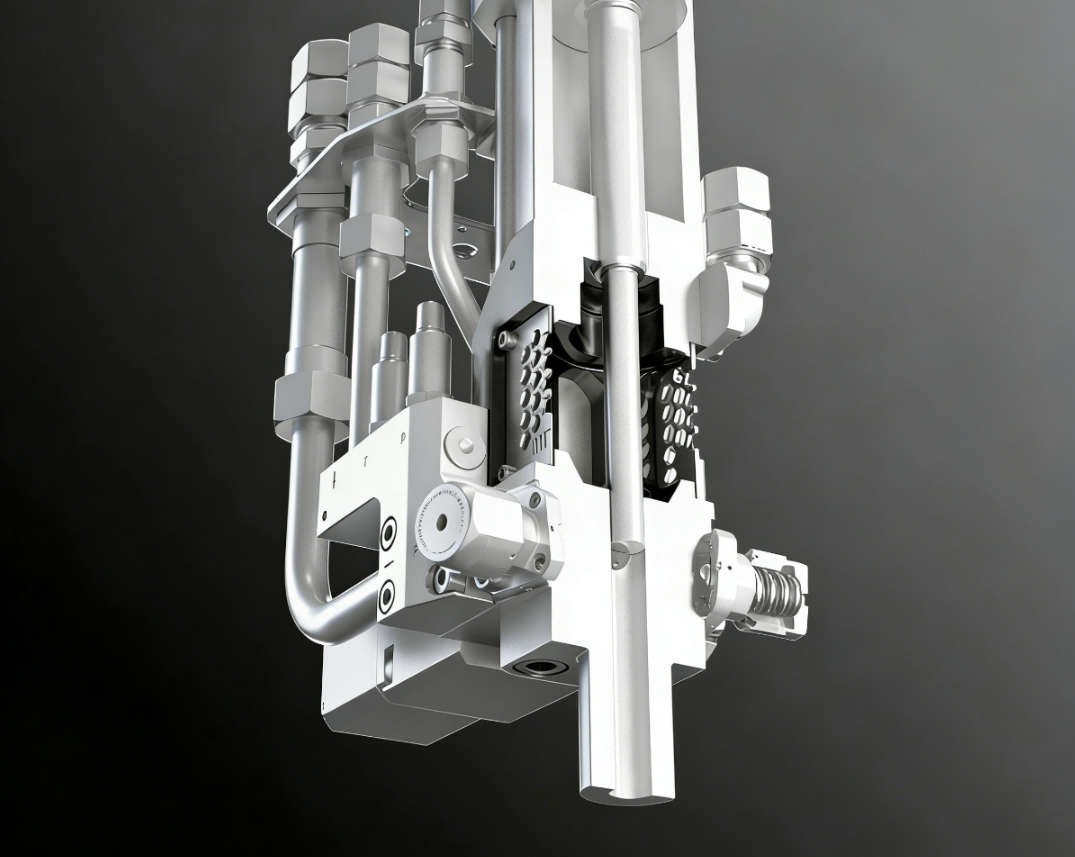
Bubbles in low-pressure polyurethane metering are not one defect with one source. Most bubble problems enter through four paths: dissolved gas or moisture already in the material, pump inlet cavitation, air leaking into a transfer or recirculation path, or air entrained inside the mixing head. The practical question is less where bubbles come from than which source is active on this line right now. The answer changes the correction: degas the component, restore inlet pressure, tighten a fitting, or change the mixing-head fill and speed. The sections below separate those causes by field evidence rather than by how a machine is marketed.

What the Bubble Pattern Tells You About the Gas Source
A bubble symptom is easiest to read when it is matched to its location and timing. Fine bubbles distributed through the shot usually point upstream to the material. Large intermittent bubbles near the pump or flow meter usually point to the pump inlet. Surface bubbles on an open pour often come from the pour path or mold face, not from the metering unit. The table below separates likely gas sources from the conclusions they do not justify.
| Bubble pattern | Probable gas source | Confirm with | Do not infer |
|---|---|---|---|
| Fine bubbles distributed through the shot | Dissolved gas or moisture in a component | Degas a sealed sample under vacuum and compare shot quality | The mixer is not necessarily too slow |
| Large intermittent bubbles near the pump or flow meter | Pump cavitation or inlet-side air leak | Read pump inlet vacuum and watch flow stability | The component ratio is not necessarily wrong |
| Surface bubbles on an open pour | Air trapped during pour or moisture on the mold face | Check pour height, mold temperature, and release-agent moisture | Every surface bubble does not mean the raw material is wet |
| Bubbles only at shot start or stop | Recirculation back-pressure change or a seating leak | Log pressure and flow during start and stop | It is not necessarily a mixing-head speed problem |
| Bubbles in only one component line | A feed problem isolated to that component loop | Switch the sampling point and inspect the tank, pump, and filter | The other component line may be clean |
| Bubbles increasing with mixer speed | Vortex or mixing-chamber air entrainment | Vary rotor speed in small steps while watching shot samples | Higher speed is not always better mixing |
How Moisture and Dissolved Gas Turn Into Bubbles
Moisture has a chemical route into the foam. Isocyanate reacts with water and releases carbon dioxide. If water is present in the polyol, in a wet drum, or in humid air above an open day tank, that carbon dioxide becomes a bubble in much the same way a blowing reaction adds gas. Dissolved gas is more subtle. Drum transfer, agitators, and recirculation can push air into the liquid without making it visible at the pump. Temperature and pressure changes can shift gas solubility, so a component that looked clear after transfer may release gas when conditions change. A first check is the raw material data sheet and storage history. If a sealed sample still releases bubbles after a vacuum rest, suspect moisture or chemical gas generation rather than mixer settings.
Why Pump Cavitation and Inlet Starvation Create Gas Pockets
At the pump, the most common mechanical bubble source is cavitation. A metering pump creates a low-pressure zone at its inlet. If the local pressure falls too far, dissolved gas can flash out or vapor cavities can form. In a low-pressure PU line, cavitation usually shows up as noisy pump operation, fluctuating movement of the shot, and bubbles that appear before the mixing head instead of inside it. Inlet restrictions act like a hidden valve: undersized hoses, cold high-viscosity material, a partly plugged filter, or low day-tank head all reduce the pressure available to the pump. A leaking fitting on the suction side may not drip product outward, but it can pull air inward. Record the inlet vacuum and compare it with the pump curve or supplier guidance. Then check the strainer, hose size, material temperature, and day-tank level before blaming the pump itself.
How the Mixing Head Traps Air Instead of Removing It
The mixing head can also generate bubbles after the metering system has delivered clean material. A dynamic mixer shears the components together, but if the mixing chamber is not full, or if the rotor speed is too high for the flow, the vortices can pull gas into the liquid. Static mixers do not usually pull air in the same way, but they cannot remove gas that is already present. A worn dynamic seal, a leaking solvent flush port, or a drain that never fully closes can form a small air path that only opens during the shot. A useful test is to change one variable while holding the others steady. If the bubble population drops when the rotor speed is reduced at constant throughput, the head is entraining gas. If the bubbles remain, the gas is more likely arriving with the material or through the pump inlet.
Low-pressure metering covers open pour, box foam, and casting, and a mixing head that works well for one duty may still trap air in another. <How Polyurethane Foam Machines Work: Types and Applications> covers how machine type and process duty change the bubble-control requirements.
When Ratio Drift and Flow Pulsation Stabilize Micro-Bubbles
Ratio drift and pulsation rarely create bubbles by themselves, but they can keep micro-bubbles evenly distributed and make the root cause harder to see. A piston or gear pump creates pressure cycles. If the recirculation pressure is too low, or a check valve is not seating cleanly, each cycle can allow a small amount of gas to enter the component loop. Ratio drift changes the viscosity and mixing behavior of the mixed material, which can change how gas is released or trapped. Servo direct-drive closed-loop metering helps by reducing the hunting that turns a small inlet disturbance into a repeating bubble population. For diagnosis, trend shot weight, component flow ratio, and recirculation pressure together. If bubbles follow the pulsation cycle, the fault is more likely hydraulic or mechanical than chemical.
When bubbles return at the same point in a batch or shift, the source is usually a maintenance or setup boundary rather than a material issue. <Continuous PU Foam Production Line Maintenance: How to Prevent Costly Downtime and Defects> covers how a planned maintenance sequence keeps metering and mixing defects from recurring.
What to Inspect First When Bubbles Appear
Start the diagnosis from the pump inlet and work toward the mixing head. The least expensive test is observation: catch a clear shot sample, watch where bubbles first appear, and compare the material before and after the mixer. Keep one change at a time so the result is explainable.
A bubble symptom is easier to trace when metering, mixing, and flush components are operating inside their calibrated window. <PU Foam Injection Machine: Key Components & Calibration Best Practices> covers how component-level calibration narrows the variables that lead to air entrapment.
- Flush and inspect inlet filters, strainers, and suction-side fittings.
- Record component temperatures and compare them with the material TDS and the current day-tank condition.
- Check day-tank level, agitation, and whether the tank is closed or under a dry-gas blanket.
- Measure pump inlet vacuum and recirculation pressure during a normal shot.
- Isolate one component loop at a time if the bubbles appear in only one side.
- Vary mixing-head speed in small steps while holding flow constant.
- Log start, stop, and changeover points because many air leaks appear only at those transitions.
What to Share When Requesting a Bubble Root Cause Review
Send the information that changes the diagnosis: component names and TDS water or viscosity data, day-tank temperature and inert-gas arrangement, pump inlet vacuum and recirculation pressure readings, mixing-head model and current rotor speed, shot weight or flow trend, and a short video of the bubble pattern if available. Without those, a bubble complaint is only a symptom.
Contact Haifeng Polyurethane Machinery at info@haifeng-automation.cn or WhatsApp +86 13566296633.
FAQ
Why do bubbles appear only at the start of a pour?
Start-of-pour bubbles usually come from a pressure or flow transition rather than a continuous material fault. The pump may be pulling against a partially open recirculation path, a check valve may not be seating, or the mixing head may be refilling with air after the previous shot. Log the pressure and flow during the first few seconds of the shot. If the bubbles disappear after flow stabilizes, focus on recirculation pressure, return-line back-pressure, and valve seating.
Do bubbles always come from leaking seals?
No. A leaking seal is only one possible air path. Moisture in the raw material, pump cavitation, an underfilled mixing chamber, excessive rotor speed, or a loose suction-side fitting can produce the same class of defect. Seals are worth checking when the bubbles are intermittent, appear near the component loop, or change when the machine starts and stops. Confirm with pressure readings and isolation tests before replacing parts.
Can vacuum degassing fix a pump-cavitation problem?
No. Vacuum degassing removes dissolved gas and some moisture from the material, but it does not restore pump inlet pressure. If the pump is starving or the inlet fitting is pulling air, the bubbles will continue even with degassed material. Use degassing for material-side gas and separate it from mechanical inlet checks. A dual-vacuum arrangement that treats the tank and the pouring head can help when both material gas and head entrainment are present.
How do I know if the bubble source is the raw material or the machine?
Isolate the material first. Take a sealed sample, degas it under vacuum, and cast or pour a controlled shot. If the sample stays clear while the machine still produces bubbles, the fault is mechanical. If the degassed sample also releases gas, the material or moisture control is suspect. The test is only meaningful when the sample is handled in a closed container and the machine conditions are recorded.
Will a higher mixing speed remove bubbles?
Not automatically. Higher speed can improve component contact, but it can also create a vortex, pull air into an underfilled chamber, or raise local shear heat. If bubbles increase with speed, the head is entraining gas. If they decrease, the prior speed may have been too low for the flow. Change speed in small increments and observe the shot because the relationship depends on fill level, viscosity, and mixing-head design.
If you’re interested, check out these related articles:
PU Rain Boot Production Line Cost
How Does a Foam Filled Tire Machine Work
What Materials Are Used in PU Safety Shoes